


Student Name: Jerico M.
Objective: This week we needed to sort everything out! It is our second last lab for this module so we had to have the robot built and the coding finished.
Procedure: From last week I mentioned about creating the rough design of what we wanted exactly. Since we’ve already prepared the materials and components we’ll be using we had to create the final layout of our robot along with the coding. For today we had to improvise as much as we had with all of the materials we needed since all of the lab rooms in DIT are locked during the Easter break so we would have to get everything done today.
The first thing we did today was to disassemble the robot that we had already built so that we could place everything else such as the ramps, breadboard and battery pack. Apart from that, we were ready to build the robot. The first thing I did while my teammates were working on the code was to carefully make changes to our wheels. What I did was add a layer of rubber strips on the wheels as shown below.

My teammate brought in some rubber tubing that you’d normally find for a bike so that our wheels can be covered since it adds more grip, making it a lot harder for our robot to be pushed off. I first cut out a piece of this tubing and used hot glue to place it around the wheel as tight as possible. This didn’t work out as the hot glue didn’t seem to stick the tubing and the wheel together and it also formed hard lumps, making the wheel awkwardly unbala nced when moving. I had to remove all of the hot glue and used super glue instead and got this as a result. I tried my best to make this layer as flat and even as possible which took quite some time as I had to be very careful, especially when I only had access to certain tools which limited my ability to work precisely. Also, another thing you can notice with the wheels is that we actually managed to fit a small shaft inside the hole so that our motor would fix into the wheel without hassle.
I then took all of the main materials we used and measured each one of them and created a list since it’s handy to have some sort of list incase changes are needed to be made .

The next thing I carried out was to cover the ramps that I obtained a few weeks ago with white tape. The theory to this was that since our ramps were really low and wide, by placing white tape on them once our ramps get in contact with other robots their sensors will see white thus making their robot reverse making them reverse until our robot can just push theirs off once they’ve reached the edge. After I’ve noted some of the measurements and improved some of our designs we assembled our robot back together and Voila!
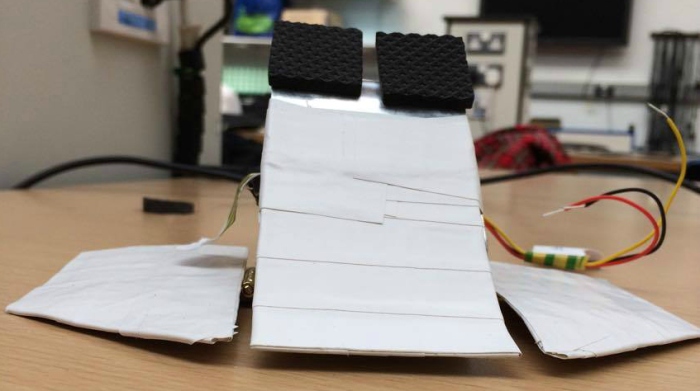
Conclusion: I really liked how our robot turned out especially with the white ramps and black materials throughout the robot. It gives some sort of a modern black & white look to it. Although wee actually had to stay back to finish our robot, I had to leave as I had other matters to attend to. My other teammates in the other hand had to stay to see if our code for the sensors worked. I think that we worked efficiently today, most likely because we were under a lot of pressure and time constraints. Every member of our group was working on different parts of the robot at the same time with me adding final touches to the robot & making measurements, Andrew working on the code and Jake also helping with the robot.
